Automated Leave Management
Handling vacation requests over chat is easy with 3 employees, but it becomes chaos at 15. UniTrack automates everything: from setting up company-wide leave types to managing individual employee balances and application workflows. This guide shows you how to establish your time-off rules once and for all.
1. The Employee Leave Dashboard
The central hub for employees to view their time-off status.

- 1Overview of Balances
Employees can instantly see their available balance across all active leave types (e.g., Earned, Casual, Sick, WFH). This eliminates the need for them to constantly ask HR "how many days do I have left?"
- 2Recent & Upcoming Leaves
The dashboard displays a chronological list of Recently Applied leaves (with their current Approved/Cancelled status) and a section for Upcoming absences and declared holidays.
2. Applying for Leave
A frictionless experience for submitting time-off requests.
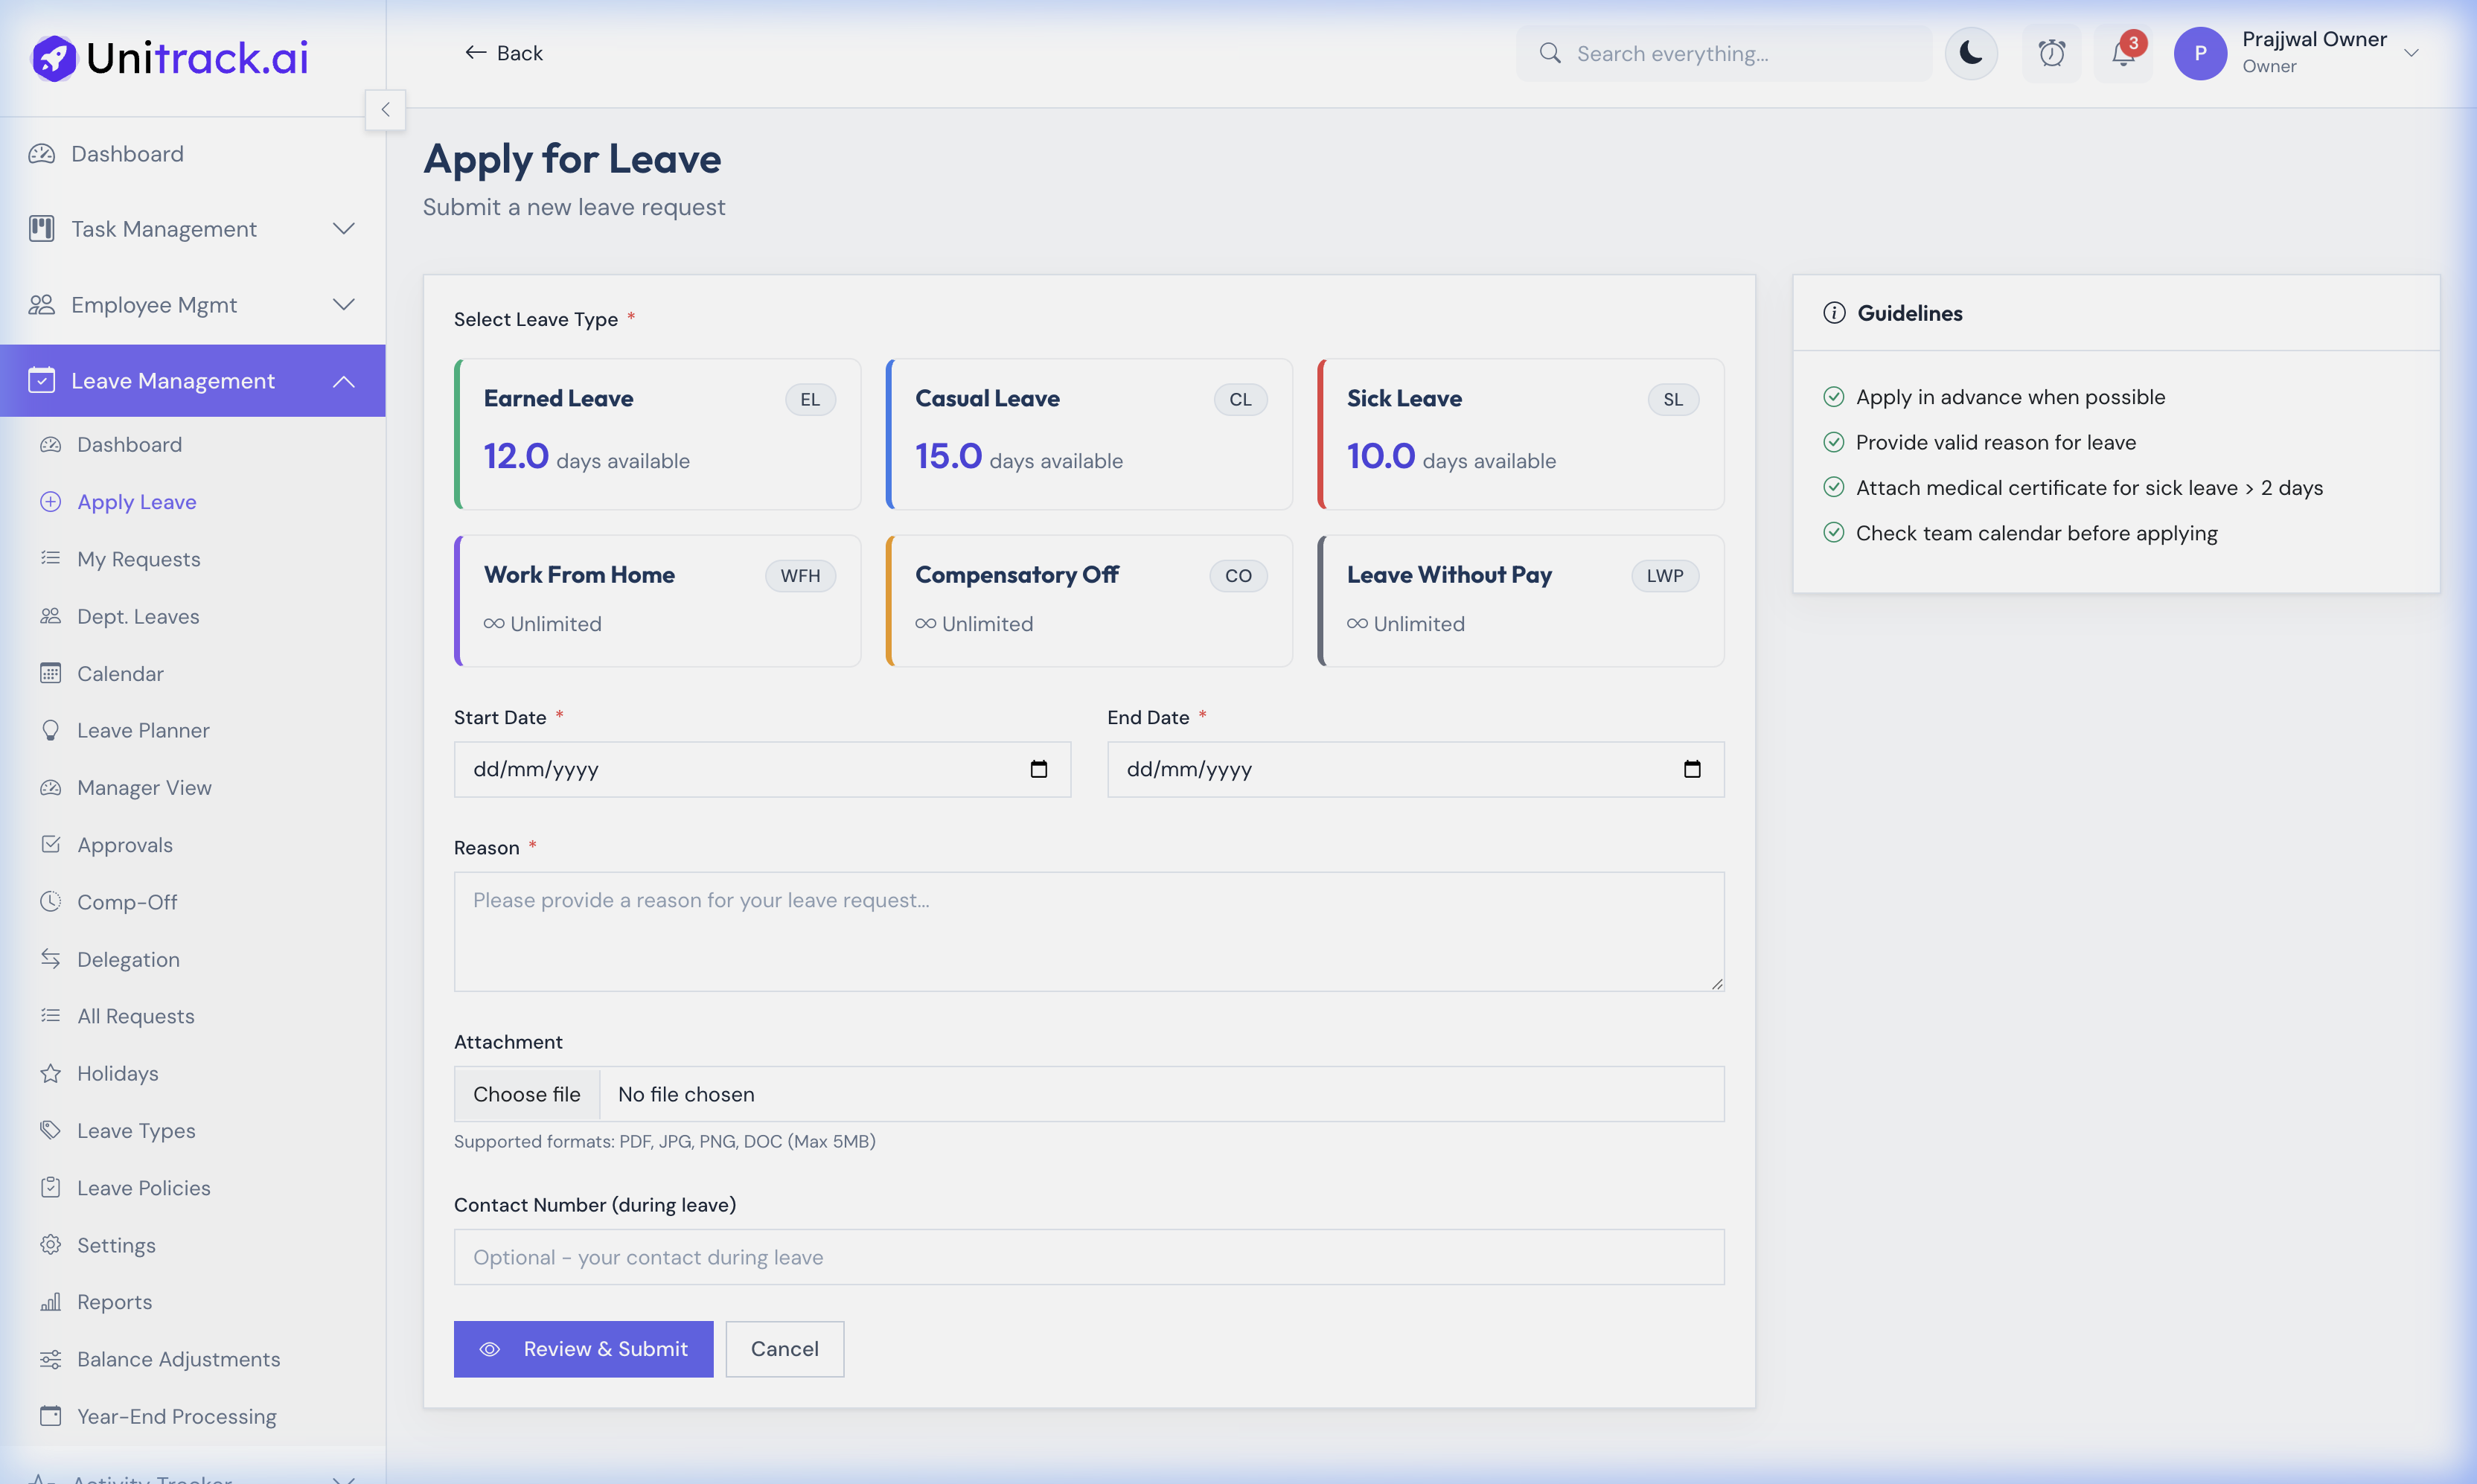
- 1Initiating the Request
Employees click on the Apply Leave button from the dashboard to open the application form.
- 2Filling the Form
They must select a Leave Type (e.g., Casual, Sick, LWP), choose their Start and End Dates using the built-in calendar, and provide a mandatory Reason. They can also provide a Contact Number for emergencies while they are away.
- 3Supporting Documents
If they are applying for Sick Leave extending beyond a certain duration (defined in your policies), they can upload medical certificates directly to the request via the Attachment field.
3. Admin View: Managing Balances
HR and Admins have global visibility into everyone's time off.
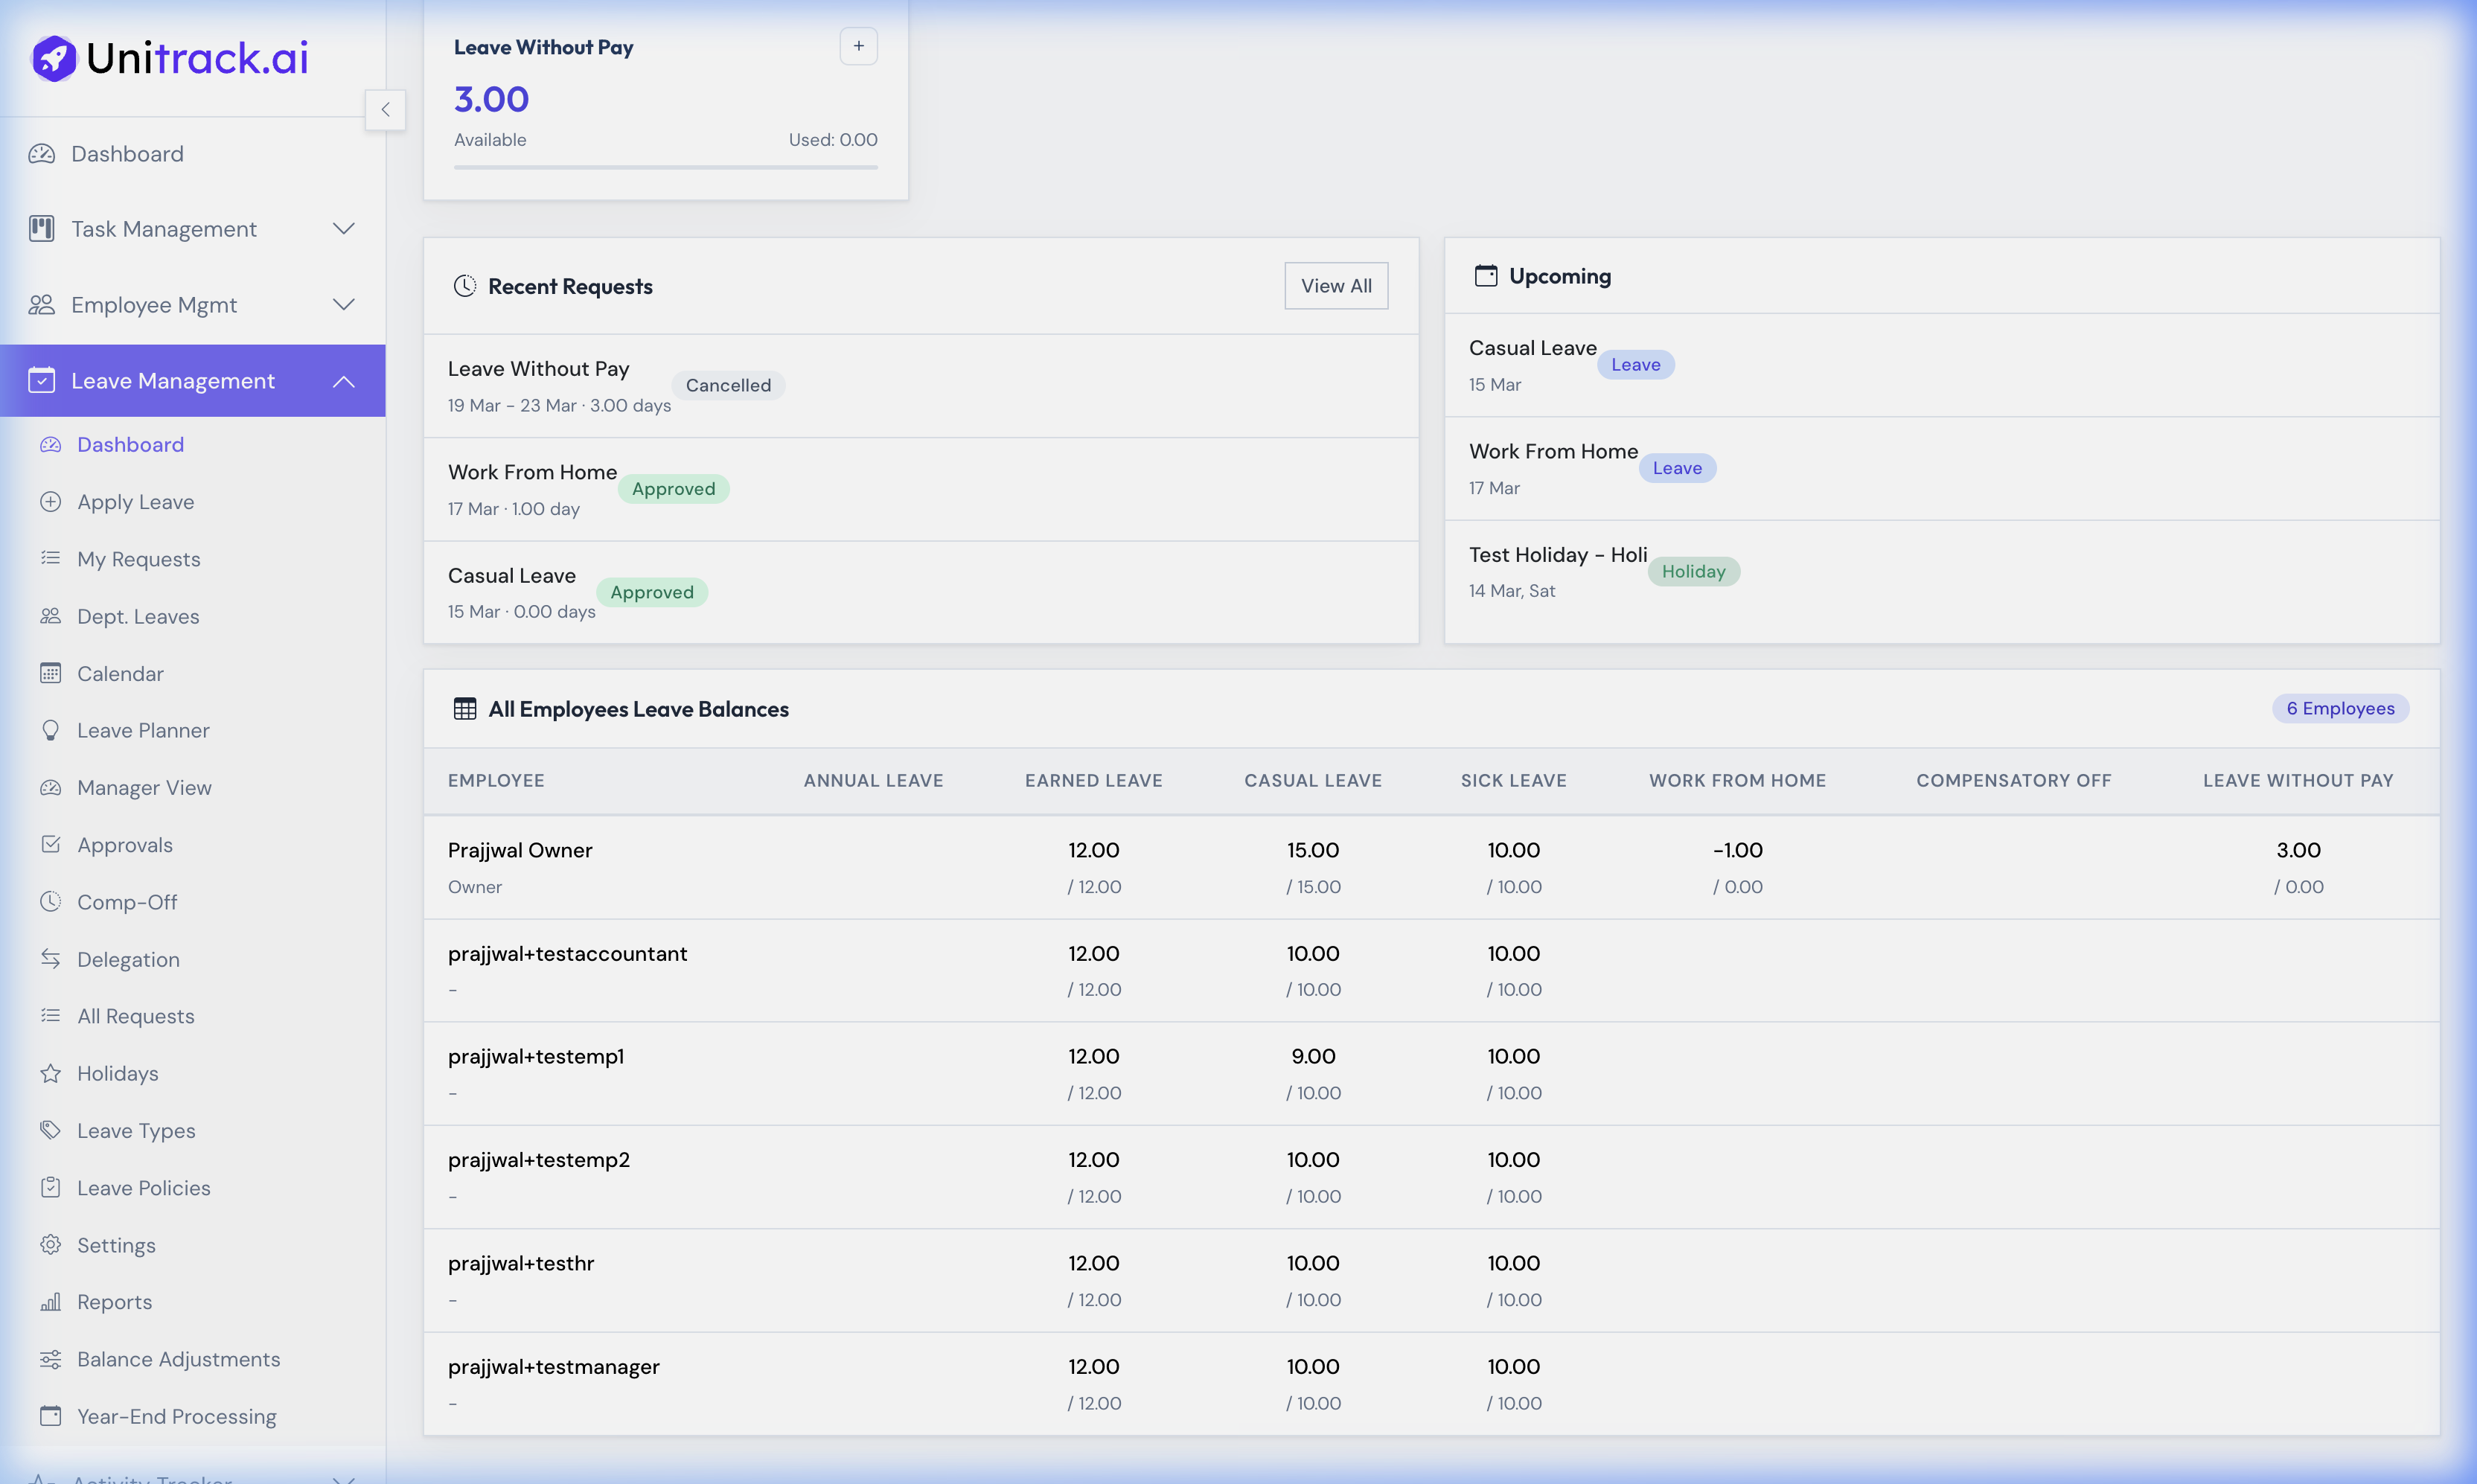
- 1The Global Balances Table
By navigating to the Leave Balances section, Admins can view a comprehensive table listing every employee alongside their remaining quota for Annual, Earned, Casual, Sick, WFH, Comp-Off, and LWP leaves.
- 2Manual Adjustments
Using the sidebar tools, Admins can perform Balance Adjustments, manually adding or deducting days to correct errors or grant special allowances outside the normal accrual process.
4. Leave Types & Policies in Detail
Leave Types define what kind of time-off exists globally, while Leave Policies control exactly who gets it and how it accrues. This is a crucial setup for HR.
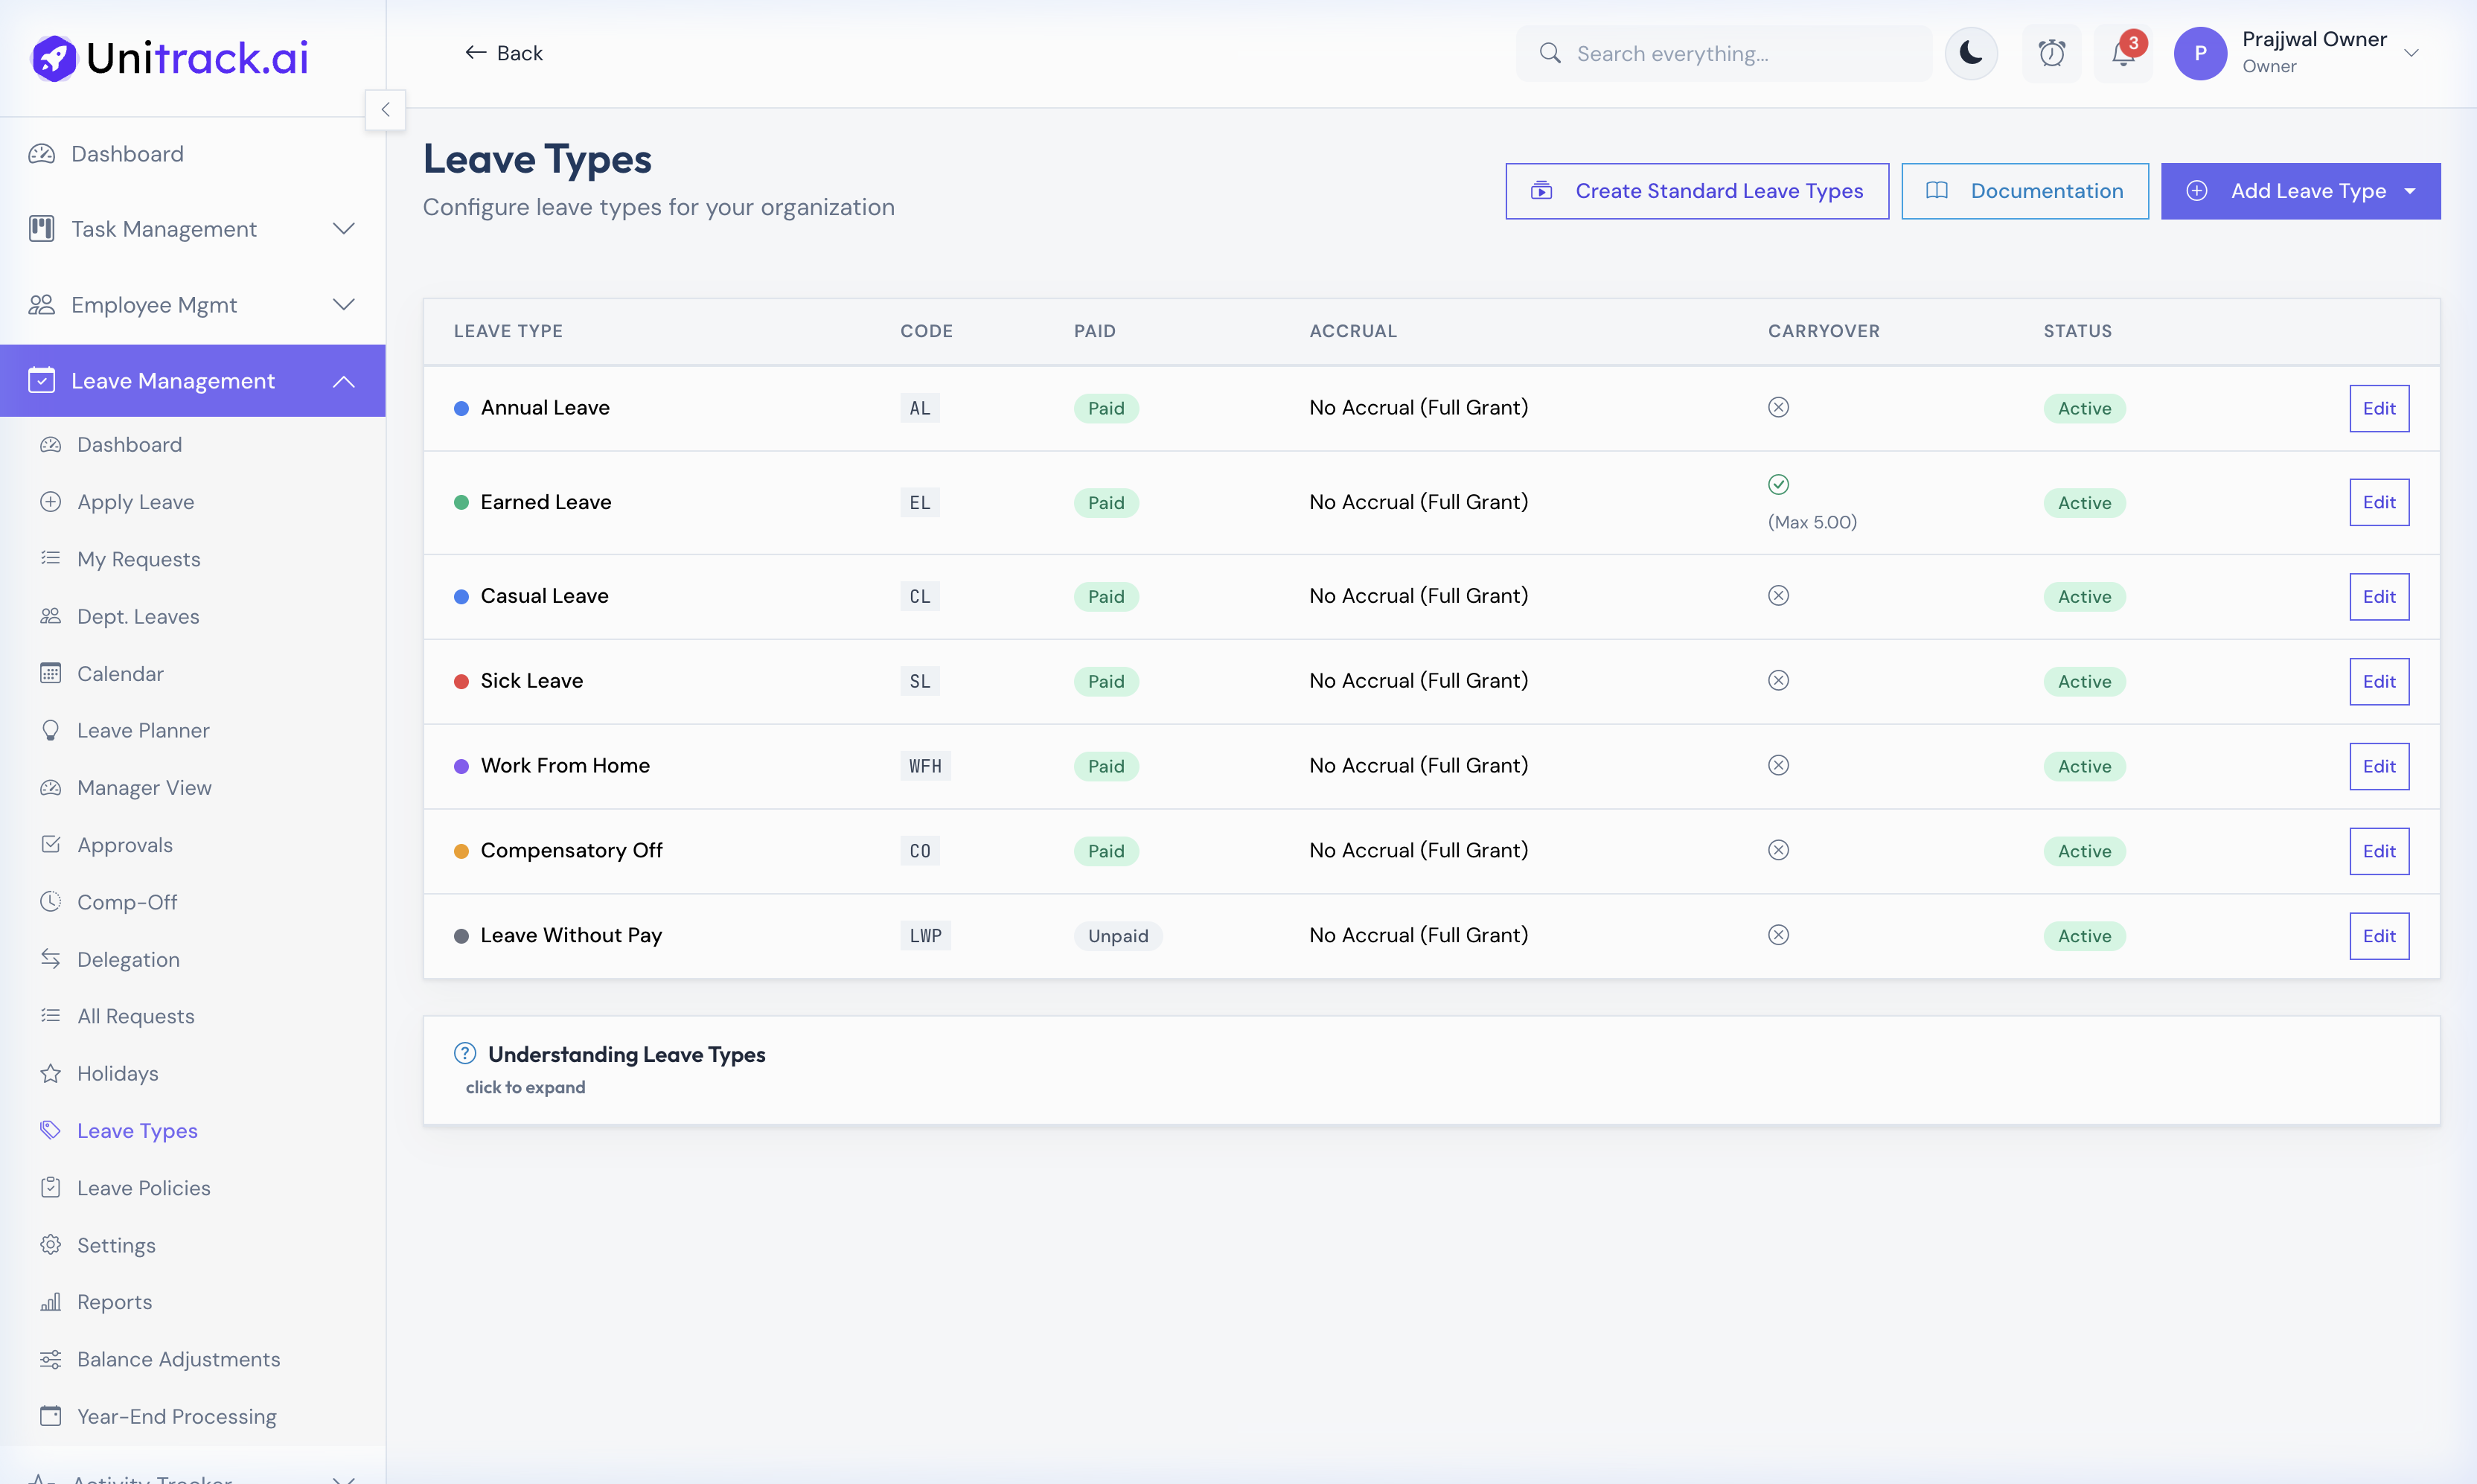
- 1Creating Leave Types
Go to Settings → Leave Types. A "Leave Type" is a global category (e.g., Casual Leave, Sick Leave, Maternity Leave). When you click + Add Leave Type, you will define:
• Name & Color: How it appears on the employee's calendar (e.g., red for Sick, green for Casual).
• Paid vs Unpaid (LWP): Check this box if deducting this leave affects payroll (e.g., Leave Without Pay is unpaid).
• Requires Proof: Check this if you want the system to force document uploads (like medical certificates) for absences longer than X consecutive days.
• Default Annual Quota: The baseline number of days granted per year globally.
5. Configuring Policy Accrual Rules
Once your Types are created, you must bundle them into a Leave Policy. Policies are assigned to specific groups (like "Interns" vs "Full-Time") to dictate their unique mathematical rules.
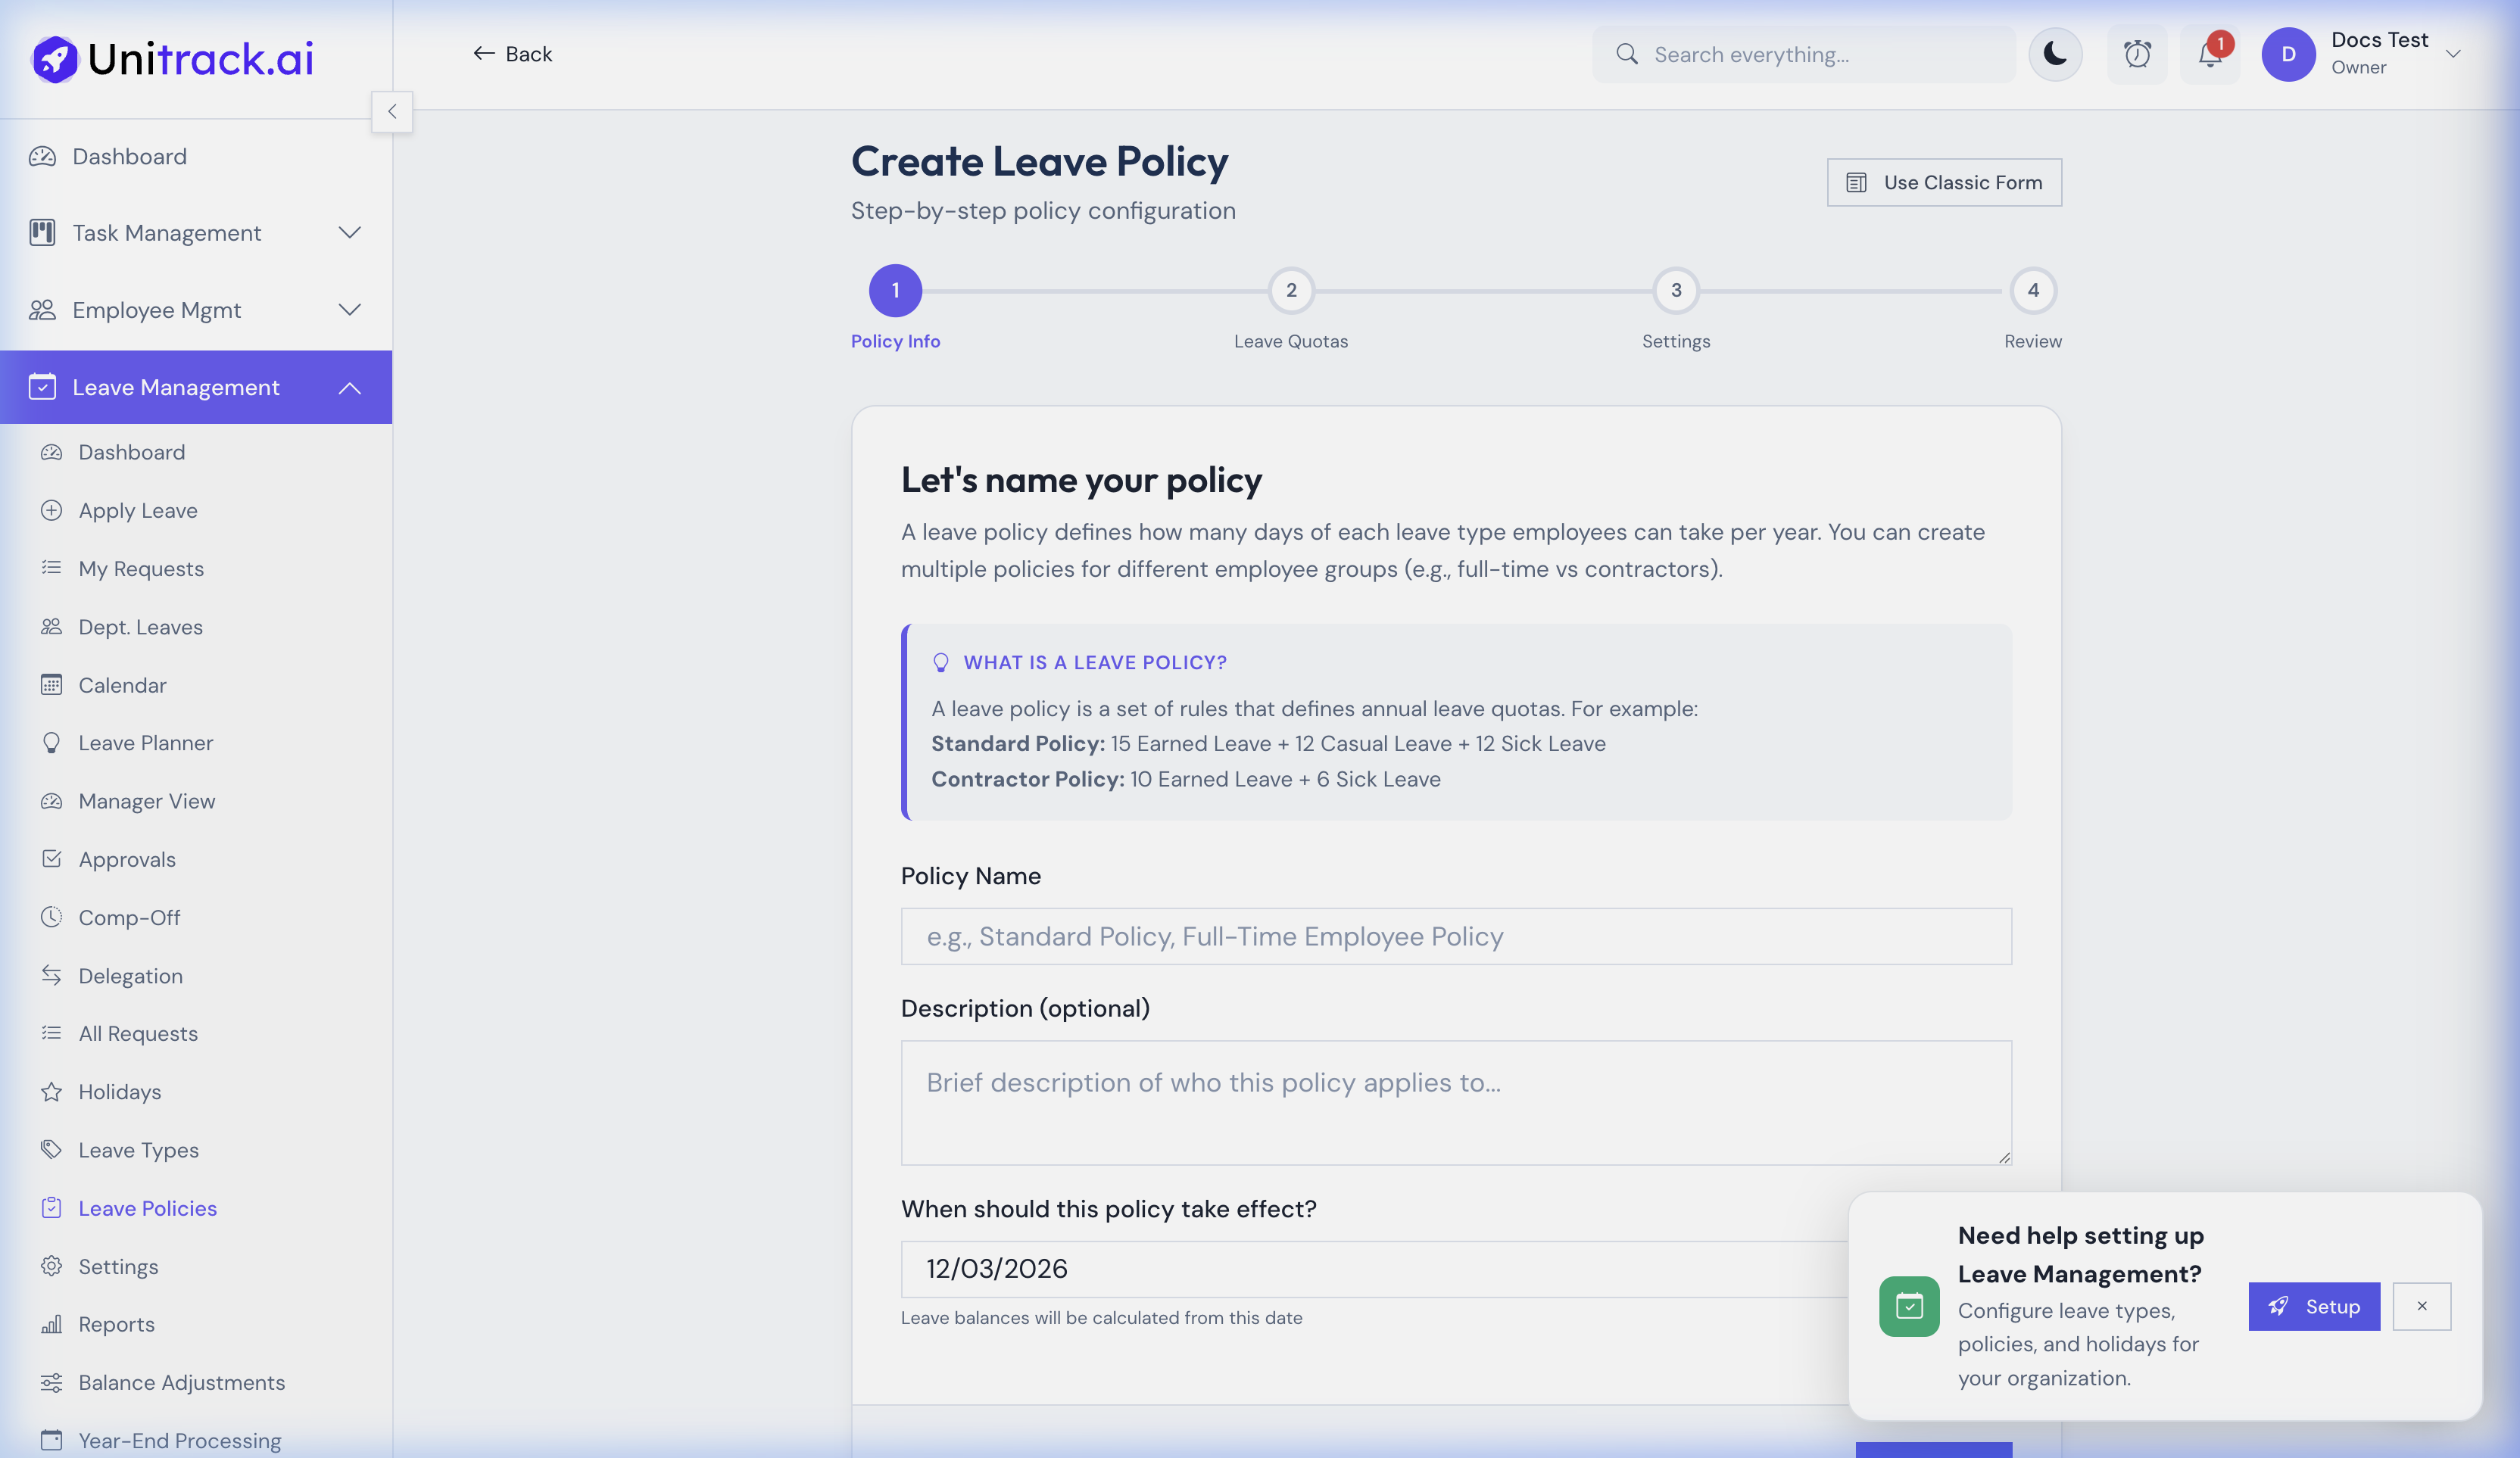
- 2Creating a Leave Policy
Navigate to Settings → Leave Policies and click + Add Policy. Give it a descriptive name (e.g., "Full-Time Employee Standard Policy") and an optional description. Set the Effective Date from which rules begin applying.
- 3Adding Policy Rules for each Type
Inside the policy form, you must add a "Rule" for every Leave Type this specialized group receives. Click Add Rule and define the exact mathematics:
• Max Balance Limit: The absolute cap on how many days an employee can hold at any one time.
• Accrual Method: Choose "Annual Upfront" (giving all 12 days on Jan 1st automatically) or "Monthly Accrual" (giving exactly 1 day per month automatically).
• Carry Forward Rules: Decide what happens at year-end. If unused leaves roll over, toggle "Allow Carry Forward" and set a Maximum Carry Over limit (e.g., cap at 5 days). The rest will lapse or be encashed. - 4Assigning Policies to Employees
Once you click Save Policy, it is active. By default, the system applies your 'default' policy to all new hires. If you created a special policy for Interns or Executives, go to the Employee's Profile, click "Edit", and change their assigned Leave Policy. The background engine will strictly calculate their balances based on the exact mathematics defined in this form.